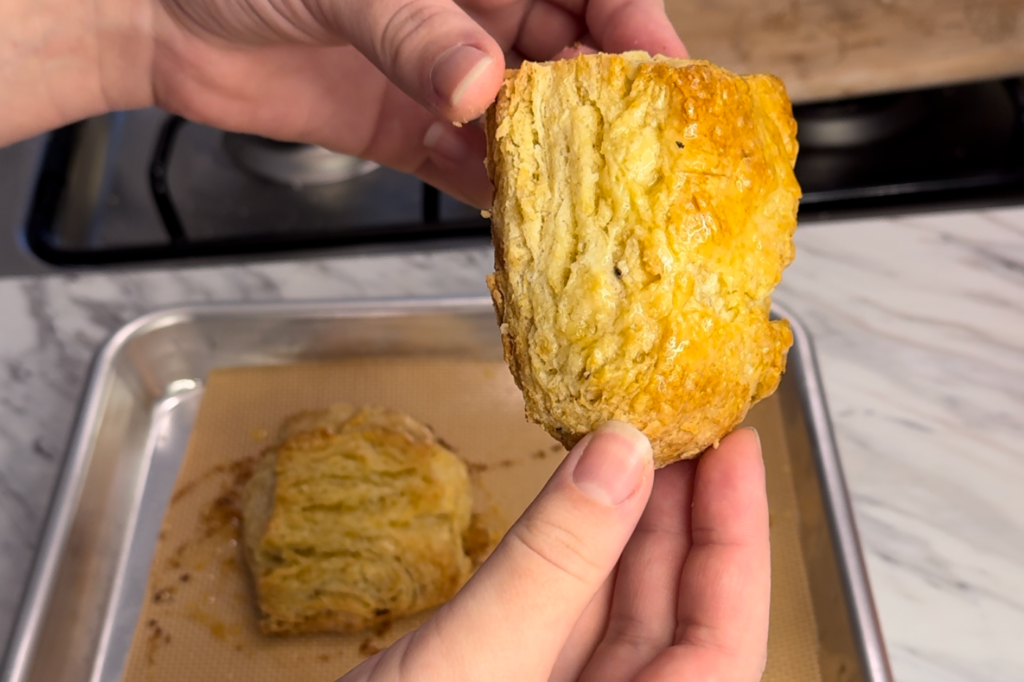
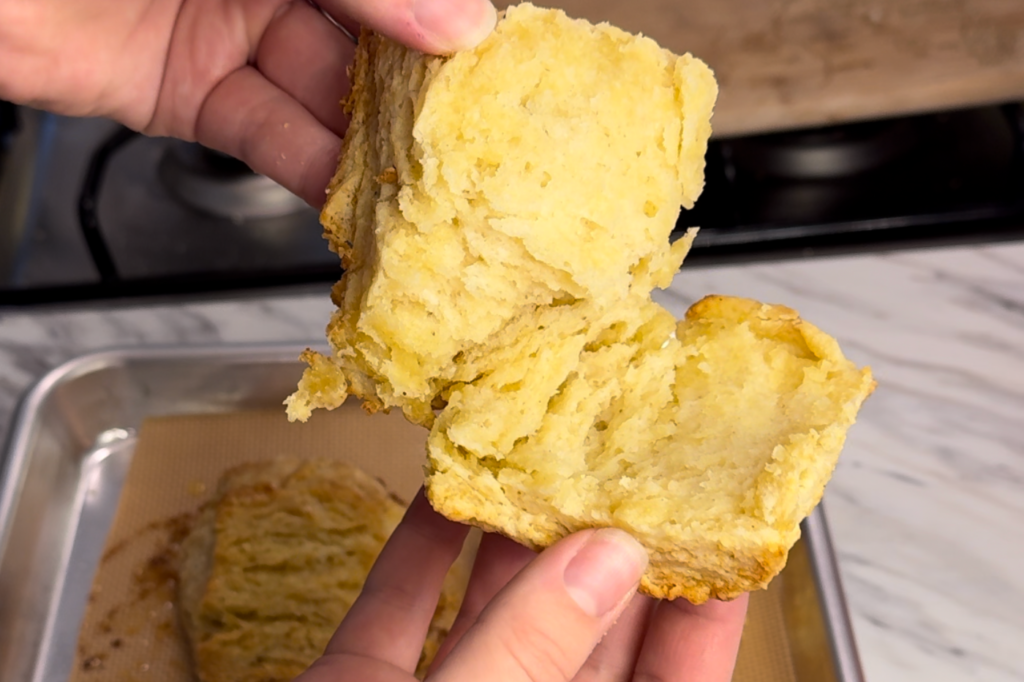
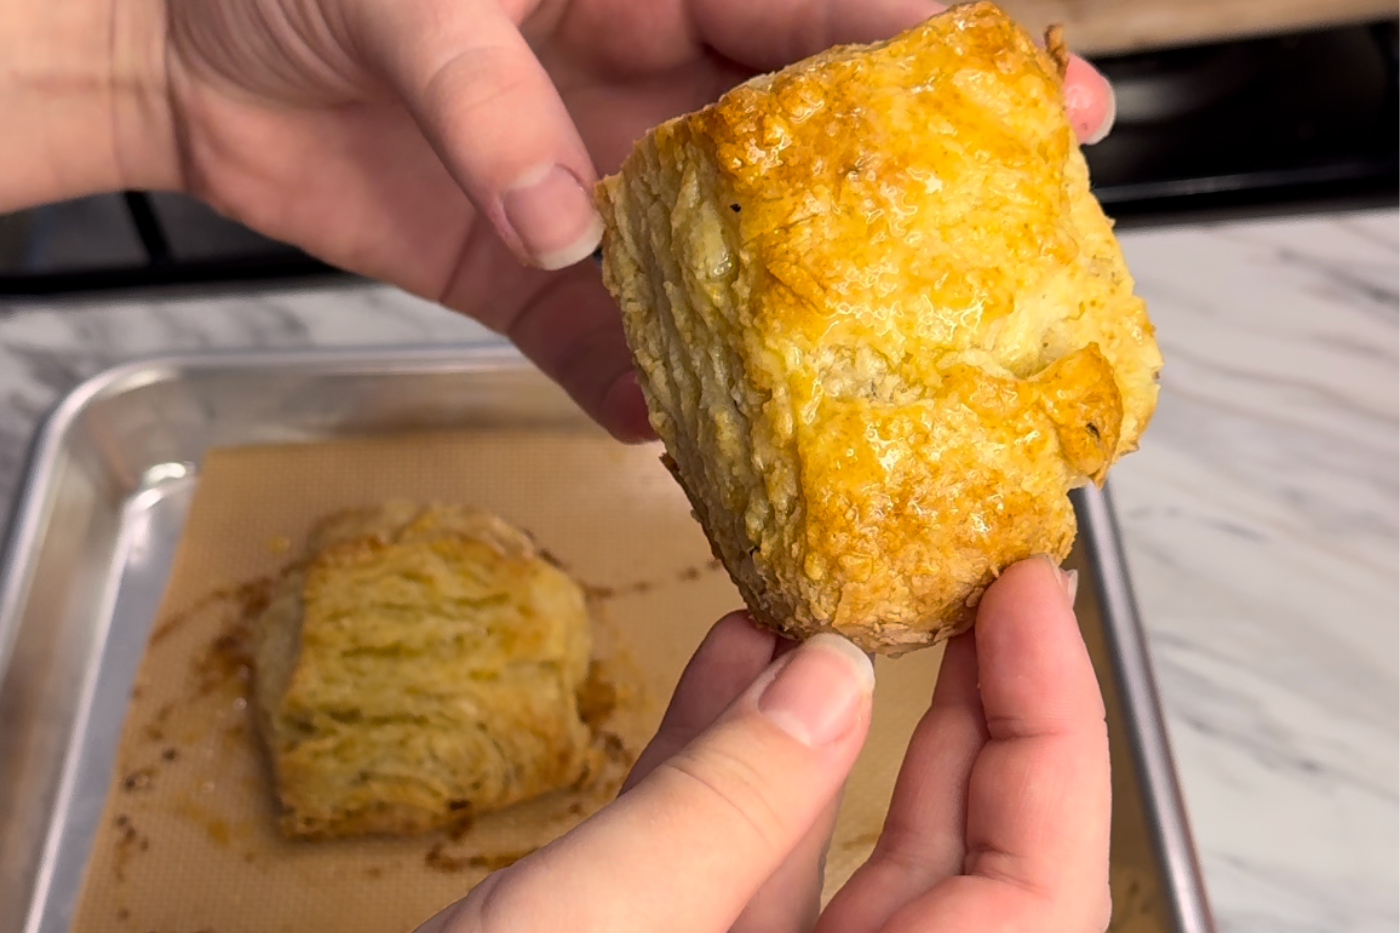
I’ll say it. Why do so many places make bad biscuits? This is not a sarcastic question, why do so many restaurants have biscuits that are tough and dry and bland? I always assumed this meant biscuits are impossible to make – turns out the flakiest, butteriest, and most flavorful biscuit you’ll ever try can come out of your kitchen with ease.
However, this doesn’t mean they are foolproof – necessarily. The perfect biscuit is a dance, but it’s a simple dance if you know the steps. And I’m here to guide you – like your dance teach, but the nice one not the mean scary one. It’s also important to note that butter and flour are the main ingredients here, and although they do have some help, there isn’t a ton of additional flavor. With that in mind, a good quality butter and flour can make a world of difference. Typically I use King Arthur for flour and Kerrygold for butter.

Alright – let’s talk method. I know there is controversy (although maybe the controversy only exist in my head) over grating vs cubing butter for biscuits, but over here we are 100% team cubing. The reason? The butter is smashed (working quickly so it doesn’t all melt) into a flour mixture to create a bunch of uneven, ragged pieces. Then, once the sour cream is added and the dough is fully together, the butter chunks remain and it is layered a few times in a mock lamination to create layers and layers of butter pockets that create steam and puff and… BOOM! Beautiful flaky layers. When you grate the butter and add it in early it tends to disappear and incorporate into the dough, resulting in you sad with no layers. All this being said, COLD BUTTER. Use cold butter. I like to pre-slice mine and then place it in the fridge before starting on my dry ingredients.
Now, let’s talk about the layering process. We are doing a letter fold, which is exactly what it sounds like. Imagine a piece of paper being folded into a letter – you fold one of the outer thirds in towards the middle and then bring the other outer third over it. This will create three sections of layers, which we then take and repeat the process with. If you don’t feel comfortable with folding the dough, cut it with a bench scraper and stack, and then gently press. This will achieve the same result.

Speaking of a bench scraper – if you have one, it will be your best friend in this recipe. I do these freeform and forgo biscuit cutters (godspeed if thats your thing – I salute you), so not only is it what I use to actually cut the biscuits, it is also incredibly helpful with shaping. Firmly put it against the side of the biscuit and gently press down to shape and even out the sides.
The last note, and one on most of my baking recipes – I have the below recipe in grams/weight and I HIGHLY encourage you to weigh your ingredients!! It is far more accurate – did you know there is not even a standard “cup”? So there really is no way to know you have the proper amount of whatever ingredient without the weight. This is especially important in baking where just a few dozen grams in the wrong direction could have a big impact. Here is the scale I use.
Honey Butter Biscuits
Course: Sides, BreakfastDifficulty: Easy8
biscuits20
minutes20
minutes39
minutesFlaky, buttery, slightly sweet, and ridiculously easy.
Ingredients
10 tbsp cold butter, in 1/2in cubes (plus more for top)
313g (2.5 C) All-purpose flour
2 1/2 tsp kosher salt (diamond crystal)
A few cracks of black pepper
1 3/4 tsp baking powder
1/2 tsp baking soda
297 (1 1/4 C) sour cream
1 Tbsp honey (plus more for top)
Directions
- Preheat oven to 425 degrees F.
- Slice your butter into 1/2in cubes and set in fridge to stay cold. Mix the dry ingredients together in large bowl until combined and then toss in your butter pieces. Working quickly to not let the butter melt, smash the pieces of butter between your fingers, working through each piece until you have varying shapes and sizes, some larger and some thin, small pieces. The flour should also start to turn a yellow color.
- Push the butter flour mixture up the sides of the bowl slightly to create a well, with plenty of flour mix still at the bottom. Add the sour cream and honey into the well space and bring together with a fork or wooden spoon until touchable, and then work the mixture with your hands just until you have one large clump.
Transfer to a clean work surface and work the dough together, pushing any stray pieces or flour bits into the center just until its a solid dough. Do not overwork or knead. - Form the dough into a rectangle that is about double as long as it is wide. Using a bench scraper to help, fold the dough like a letter, bringing the right third toward the center and then overlapping with the left third. Gently press into another rectangle and repeat fold.
- Using the bench scraper or a straight edge of a tupperware, box, etc., against the edge of the dough, gently press into the dough the create straight, even edges. Repeat on all four sides for a tidy rectangle. Cut into 8 equal biscuits.
- Place on a parchment lined baking sheet and brush with a 1:1 mix of more melted butter and honey. Sprinkle flaky salt on top and bake for 20-24 minutes, until golden brown. Immediately brush with more honey butter and serve.
For longterm/easy storage, wrap in tinfoil and freeze after baking. Then, bake in the tinfoil at 425 F for 10 minutes for a fresh biscuit.


